
Kissing spine is no longer a career-ending diagnosis for many UK horses. With a structured plan and the right team, you can reduce pain, rebuild strength, and safely return your horse to regular work.
Key takeaway: Most horses with kissing spine improve with a targeted, UK-friendly rehab plan built around core strength, correct posture, and careful progression — and some are back in full training in around 4 months.
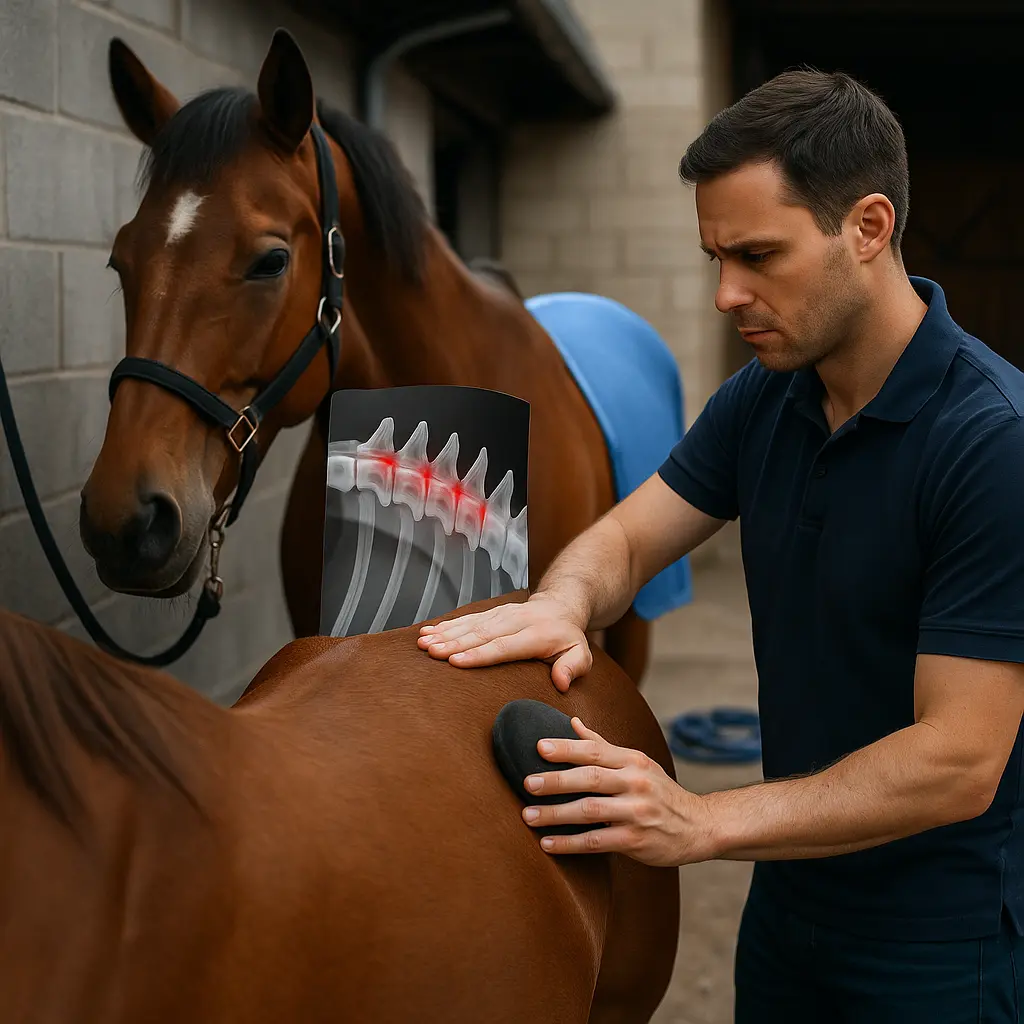
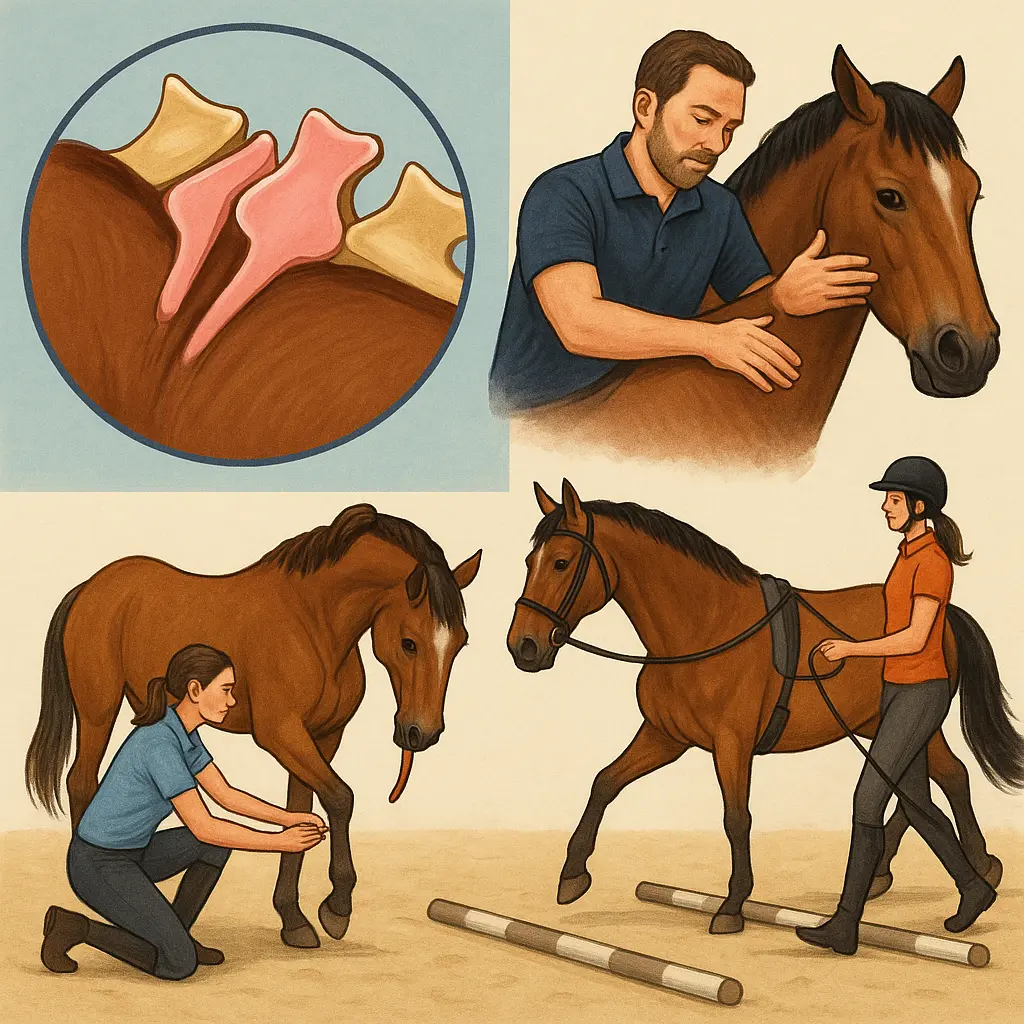
What is kissing spine and where does it hurt?
Kissing spine (overriding dorsal spinous processes, ORDSP) most often affects the thoracic spine under the saddle area, where rider weight can exacerbate pain. This is typically towards the back of the rib cage, around the mid-to-posterior saddle panels.
Those bony “fin-like” projections along the top of the vertebrae can touch or overlap, leading to inflammation, muscle guarding, and reduced back mobility. As The Horse Physio explains, location matters: problems right under the saddle make poor fit and rider asymmetry particularly influential — and fixable. That’s why rehab prioritises core stability, postural control, and saddle assessment from day one.
Early signs and how to confirm pain
Early signs include back pain, reduced performance, and resistance under saddle — often in the saddle region because of the thoracic location. Confirm ridden comfort using a structured tool like the 20‑behaviour Ridden Horse Pain Ethogram (RHPE) and your vet’s examination.
Common red flags include ear pinning, tail swishing, hollowing the back, napping, reluctance to canter, girthiness, and stiffness through transitions. The RHPE helps you track pain-related behaviours objectively before, during, and after sessions (The Horse Physio). Combine this with veterinary assessment and high-quality imaging when indicated. Also scrutinise the saddle; pressure points over affected thoracic vertebrae quickly amplify pain (Bark and Ride Physio).
Quick tip: Watch your horse’s reaction during grooming over the saddle area — flinching, dipping, or resentment can signal discomfort. A soft brush and consistent routine from our grooming essentials can make daily checks more comfortable and informative.
Can I keep riding during rehab?
Yes — if your horse shows no pain using the RHPE, short, sympathetic ridden work focused on posture and back lift can help rehabilitation. If pain is evident, pause ridden work and build core strength in-hand first.
Equine physiotherapist Sue Palmer (The Horse Physio) is clear on how to decide:
“If the horse is not in pain in his ridden work, which you can measure using the Ridden Horse Pain Ethogram, then it’s likely that ridden work will benefit him, as long as it is done sympathetically and with the aim of building and supporting core strength, postural stability, and spinal flexibility.” — Sue Palmer
Keep early rides short, prioritise long-and-low frames achieved through relaxation (not gadgets that force the head down), and re-check the RHPE weekly. Ensure your saddle is assessed by a qualified fitter and consider a shock-absorbing pad from trusted brands like LeMieux to buffer pressure over the thoracic spine. If you’re hand-walking on verges or quiet lanes, stay safe with supportive riding boots and high‑visibility layers from our hi-vis selection.
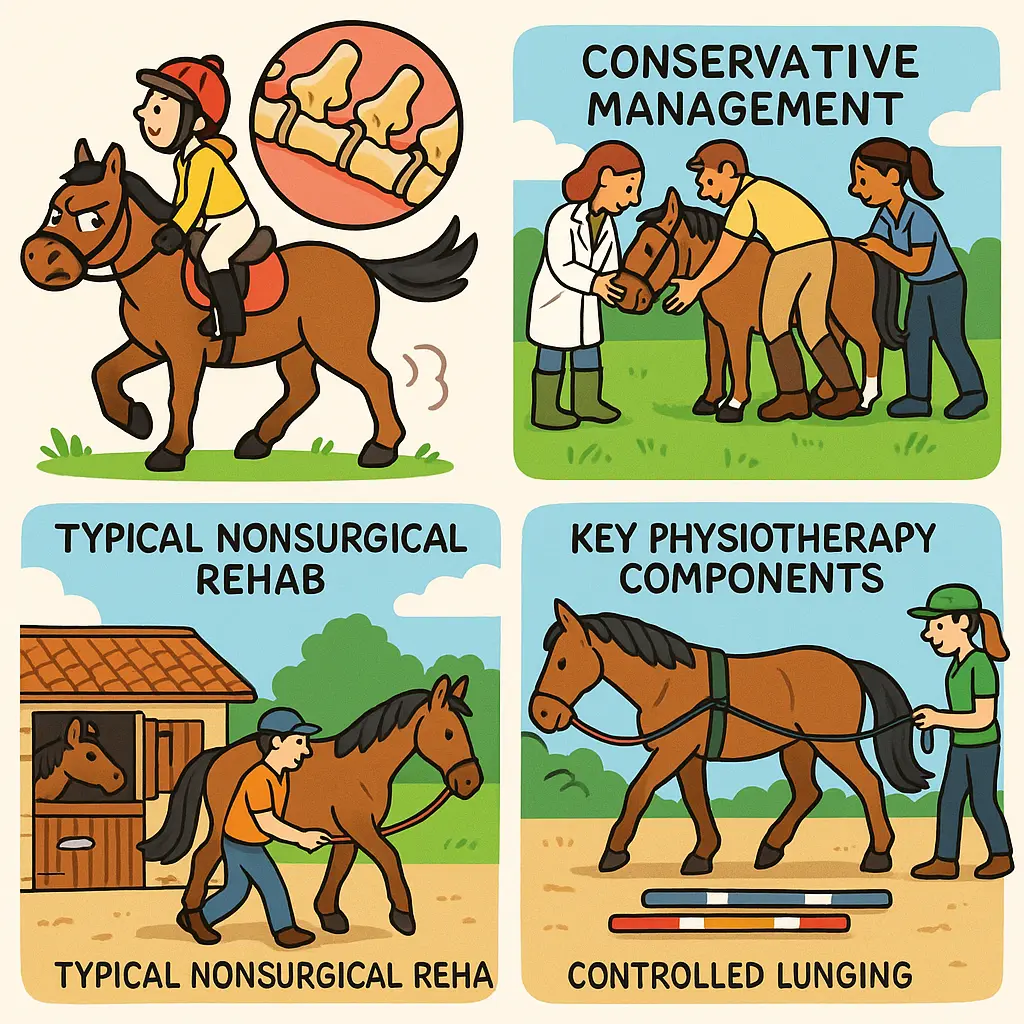
A proven 4‑month conservative rehab plan
Non-surgical rehab typically begins with around 3 weeks of box rest/hand-walking, before adding lunging and core work; some horses return to full training by month four. This structured, progressive approach is supported by work from the Ontario Veterinary College, summarised in Equus Magazine.
Here’s a UK-friendly framework you can adapt with your RCVS-registered vet and qualified physiotherapist:
Phase 1: Weeks 1–3 — Settle pain, start controlled movement
- Box rest or small, well-bedded pen turnout (especially vital in wet, muddy UK winters to avoid slips).
- 10–15 minutes of in-hand walking on firm, flat surfaces once or twice daily, increasing slowly if comfortable.
- Daily baited “carrot” stretches (chin to chest, to knees, to fetlocks; lateral to girth) to encourage thoracic flexion and back lift (The Horse Physio).
- Physio-guided manual therapy and, if advised, electrotherapies like laser or PEMF to settle muscle tension (IP Vet Physio).
- Discuss pain relief with your vet and review saddle fit now to avoid re‑triggering soreness when work increases.
Phase 2: Weeks 4–6 — Activate the core, mobilise the spine
- Introduce in-hand pole work 2–3 times weekly, starting with 4–6 poles at walk, spacing to promote correct step length and back lift.
- Add short lunging sessions (10–15 minutes) in a controlled frame. Many clinicians favour aids that promote abdominal engagement, such as the Equiband Pro (Equicore Concepts).
- Continue baited stretches and progress to gentle hill walks if footing is safe and the RHPE remains pain‑free.
- Protect limbs during polework with supportive horse boots and bandages to keep the focus on back mechanics, not knocks.
Phase 3: Weeks 7–10 — Strength and straightness
- Progress pole configurations (fan shapes, slightly raised cavaletti) to challenge straightness and thoracic mobility without fatigue.
- Begin short, pain‑free ridden walks if the RHPE is clean and your physio agrees; prioritise soft, elastic contact and a swinging back.
- Use a well-fitted saddle plus, where appropriate, a shock‑absorbing pad (see LeMieux pads and numnahs) to reduce focal pressure over affected thoracic areas.
Phase 4: Weeks 11–16 — Return to work
- Build duration in walk and trot with frequent transitions, shallow loops, and gentle lateral work to maintain lift and suppleness.
- Reintroduce canter only when the RHPE remains pain‑free in walk and trot, and core stability is evident from the ground.
- Maintain twice‑weekly polework and weekly physio check‑ins initially; taper as consistency returns.
- Support soft‑tissue recovery with targeted nutrition (omega‑3s, antioxidants like vitamin E/selenium) from our curated supplements range alongside veterinary advice.
Pro tip: Progressions are earned, not scheduled. If you see new RHPE pain behaviours, stiffness, or resentment, step back a week and re‑establish comfort before advancing again.
Post‑surgery weeks 1–4: what changes?
After kissing spine surgery, the first month focuses on box rest or limited turnout, controlled in‑hand walking, and gentle manual therapy to manage muscle tension and early scar tissue. You’ll still build core strength — you’ll just start more cautiously.
Gadd Osteopathy outlines Phase 1 (Weeks 1–4) as box rest or small penned turnout, short in‑hand walks, and light osteopathic/physio input to restore comfortable range through the thoracic spine. In UK winters, footing is everything: well-drained, non‑slip yards and small pens prevent setbacks. Pain management is veterinary‑led; your therapist will layer in gentle mobilisation and soft‑tissue work to prevent guarding. Expect groundwork (poles, lunging with core aids) a little later than in conservative plans, and only as your surgeon and physio agree.
Quick tip: Keep records. Note daily walking time, stretch reps, and any RHPE behaviours. Objective notes keep your whole team aligned and help your insurer and yard manager understand the plan.
The rehab toolkit: saddle, rider, feet, physio and nutrition
Success depends on saddle fit, rider technique, hoof balance, and targeted physiotherapy — not one element alone. Addressing all four, plus smart equipment choices, is what shifts spinal loading away from painful thoracic segments.
Saddle fit and pads — A qualified saddle fitter should assess balance, panel contact, and wither clearance over affected thoracics. Shock‑absorbing, well‑designed pads can buffer pressure while the back re‑muscles; our customers rate the quality and consistency from LeMieux.
Rider influence — Sympathetic riding that encourages a lifted, swinging back is non‑negotiable. Short sessions, frequent transitions, and tactful hands help. Consider a lunge lesson for your own position — a small change in your symmetry can transform your horse’s comfort.
Hoof balance — Farriery is a cornerstone. Balanced feet improve posture and reduce compensatory strain along the kinetic chain (Dr Barbara Parks). Loop your farrier into the plan; shorter trim intervals during early rehab can help maintain balance as musculature changes.
Physiotherapy and electrotherapies — The consensus is clear:
“Physiotherapy is vital in the rehabilitation of horses with kissing spines. A tailored program may include techniques like stretching, in-hand pole work and electrotherapy. Exercises that promote flexibility and core strength are crucial.” — C Reynolds Vet Physio
Expect manual therapy, sports massage, and modalities like laser or PEMF, all used within a progressive exercise plan (IP Vet Physio, Bark and Ride Physio). Many UK practitioners are mobile, making yard-based rehab straightforward.
Core activation tools and exercises — Equine rehab specialists at Equicore Concepts recommend baited activations, in‑hand pole work, and lunging with the Equiband Pro to cue abdominal lift and controlled movement. Start simple; complexity comes later when movement is pain‑free and repeatable.
Veterinary therapies — Work with your RCVS-registered vet to plan analgesia and, if needed, therapies such as shockwave or mesotherapy, delivered under UK welfare standards (Animal Welfare Act 2006). Injections and more invasive steps are rarely first-line when conservative rehab and saddle/hoof/rider changes are still to be optimised.
Safety and handler comfort — Controlled hand-walking and roadwork demand sturdy, grippy footwear and visibility. Choose supportive horse riding boots and layer from our hi‑vis collection for dark winter afternoons.
UK‑specific management and common mistakes to avoid
In the UK, manage mud with small pens and firm walking surfaces, don’t rush ridden work before core stability, and avoid over‑rugging that restricts back mobility. Seasonal planning prevents avoidable setbacks.
Winter and mud — Limit turnout to small, well-drained areas in Weeks 1–4 to prevent slips. If your horse lives out, choose breathable, well-fitted turnout rugs that don’t bridge the back or impede shoulder movement, and monitor weight/comfort daily.
Spring and summer — Capitalise on better ground to progress poles and hill work outdoors. Long daylight helps you fit in two short sessions rather than one long one — kinder for backs rebuilding strength.
Autumn — Damp conditions tempt heavy rugs. Keep them as light as your horse’s condition allows to protect thoracic movement, checking for rubs as musculature changes. Continue RHPE checks as training ramps up.
Common mistakes
- Rushing straight back to schooling once pain eases — build the core first, then the workload.
- Skipping the saddle/hoof/rider triad — success relies on all three alongside physio.
- Inconsistent surfaces — alternate between deep and slippery ground and you’ll court flare-ups; consistency helps tissue adapt.
- Neglecting daily stretches — they’re the cheapest, most effective part of your programme.
At Just Horse Riders, we recommend planning your week in advance, pencilling in two short core sessions, one physio‑approved lunge, and one easy hack or in‑hand walk — adjusting with the RHPE and your therapist’s input.
FAQs
What are the earliest signs of kissing spine in performance horses?
Back pain, reluctance to go forward, hollowing under saddle, tail swishing, ear pinning, and resistance in transitions are common early clues, particularly under the saddle because the thoracic spine is often involved (The Horse Physio; Bark and Ride Physio). Confirm ridden comfort using the RHPE’s 20 behaviours.
Can my horse keep working during non-surgical rehab?
Yes — if they’re pain‑free on the RHPE. Keep sessions short and sympathetic, focused on postural stability and back lift. If pain appears, pause ridden work, review saddle/hoof balance, and return to in‑hand exercises until comfortable (Sue Palmer).
How long does conservative rehab take?
A structured plan can see some horses back in full training in about 4 months, following an initial 3‑week rest/hand‑walking phase and progressive lunging/pole work (Equus Magazine). Early, consistent intervention improves outcomes.
What exercises help avoid surgery?
Daily baited stretches, in‑hand pole work, and controlled lunging with core‑activation aids like the Equiband Pro are mainstays (Equicore Concepts; IP Vet Physio). Progress slowly to maintain flexibility without overloading.
What role does the farrier play?
Hoof balance is pivotal. Correct angles and symmetry improve posture and reduce compensatory back strain, supporting thoracic comfort throughout rehab (Dr Barbara Parks).
When should I call the vet?
If pain persists despite rest and a saddle check, or the RHPE flags repeated behaviours. Your RCVS-registered vet can discuss options such as shockwave or mesotherapy and coordinate with your physio under UK welfare standards.
What kit is genuinely useful for rehab days?
Core‑activation tools for lunging, ground poles, a well‑fitted saddle with a quality pad (see LeMieux), supportive riding boots for you, and visibility for hand‑walking from our hi‑vis range. Many owners also add targeted nutrients from our supplements collection after consulting their vet.
Ready to start? Build your weekly plan, book your RCVS vet and qualified physio, and set yourself up with safe yardwear and simple rehab tools. For everyday essentials — from protective horse boots and bandages for polework to breathable turnout rugs — our team at Just Horse Riders is here to help.